


Description
Overview
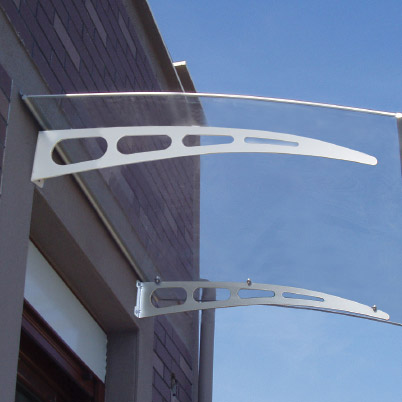
Advaning PA Series door awnings are designed to divert rain and snow away from your doors and windows while maintining a sleak modern profile. Its design gently enhances the exterior aesthetics of homes and businesses. Its durable silver finished aluminum brackets hold the solid polycarbonate sheet securely in place with 3 connecting screws. Advaning PA Series door awnings are proven for any DIY’er or Pro, safe and reliable, and simple to assemble.
PA Series Awnings Include:
- Solid Polycarbonate Sheet (pre-drilled)
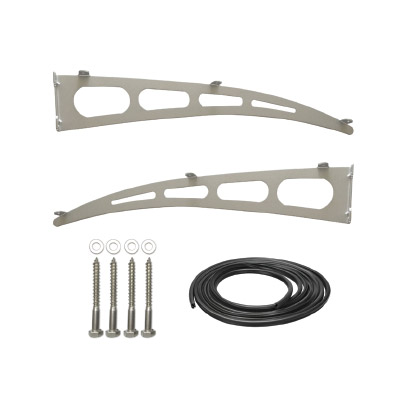
- Awning Front and Rear Aluminum Bars with Rubber Strip
- Solid Aluminum Brackets
- Bracket Securing Screw Sets
- Lag Screw and Cap (wood installation)
Note ~ Solid Masonry Installation can be achieved, however, require Masonry Expansion Bolt, Part#ZDA-WEB-R2, Sold Separately
Features
Aluminum Brackets
PA Series features solid piece die-cut aluminum brackets that require no maintenance and are corrosion-resistant. Powder coat finished with a metallic silver flake for a sleek and subtle sheen.
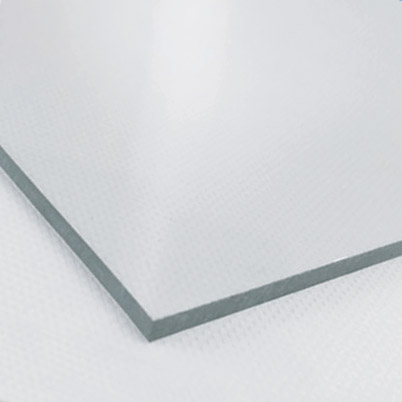
Solid Polycarbonate Sheet
Industry surpassing polycarbonate sheets provides glass-like clarity with the security of tough outdoor plastics. Shatter-resistant and independently tested for superior strength. Our polycarbonate also provides UV Protection to further guard your doors and windows against excess fading.
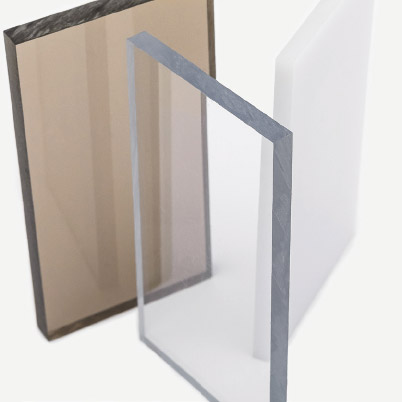
Color Options
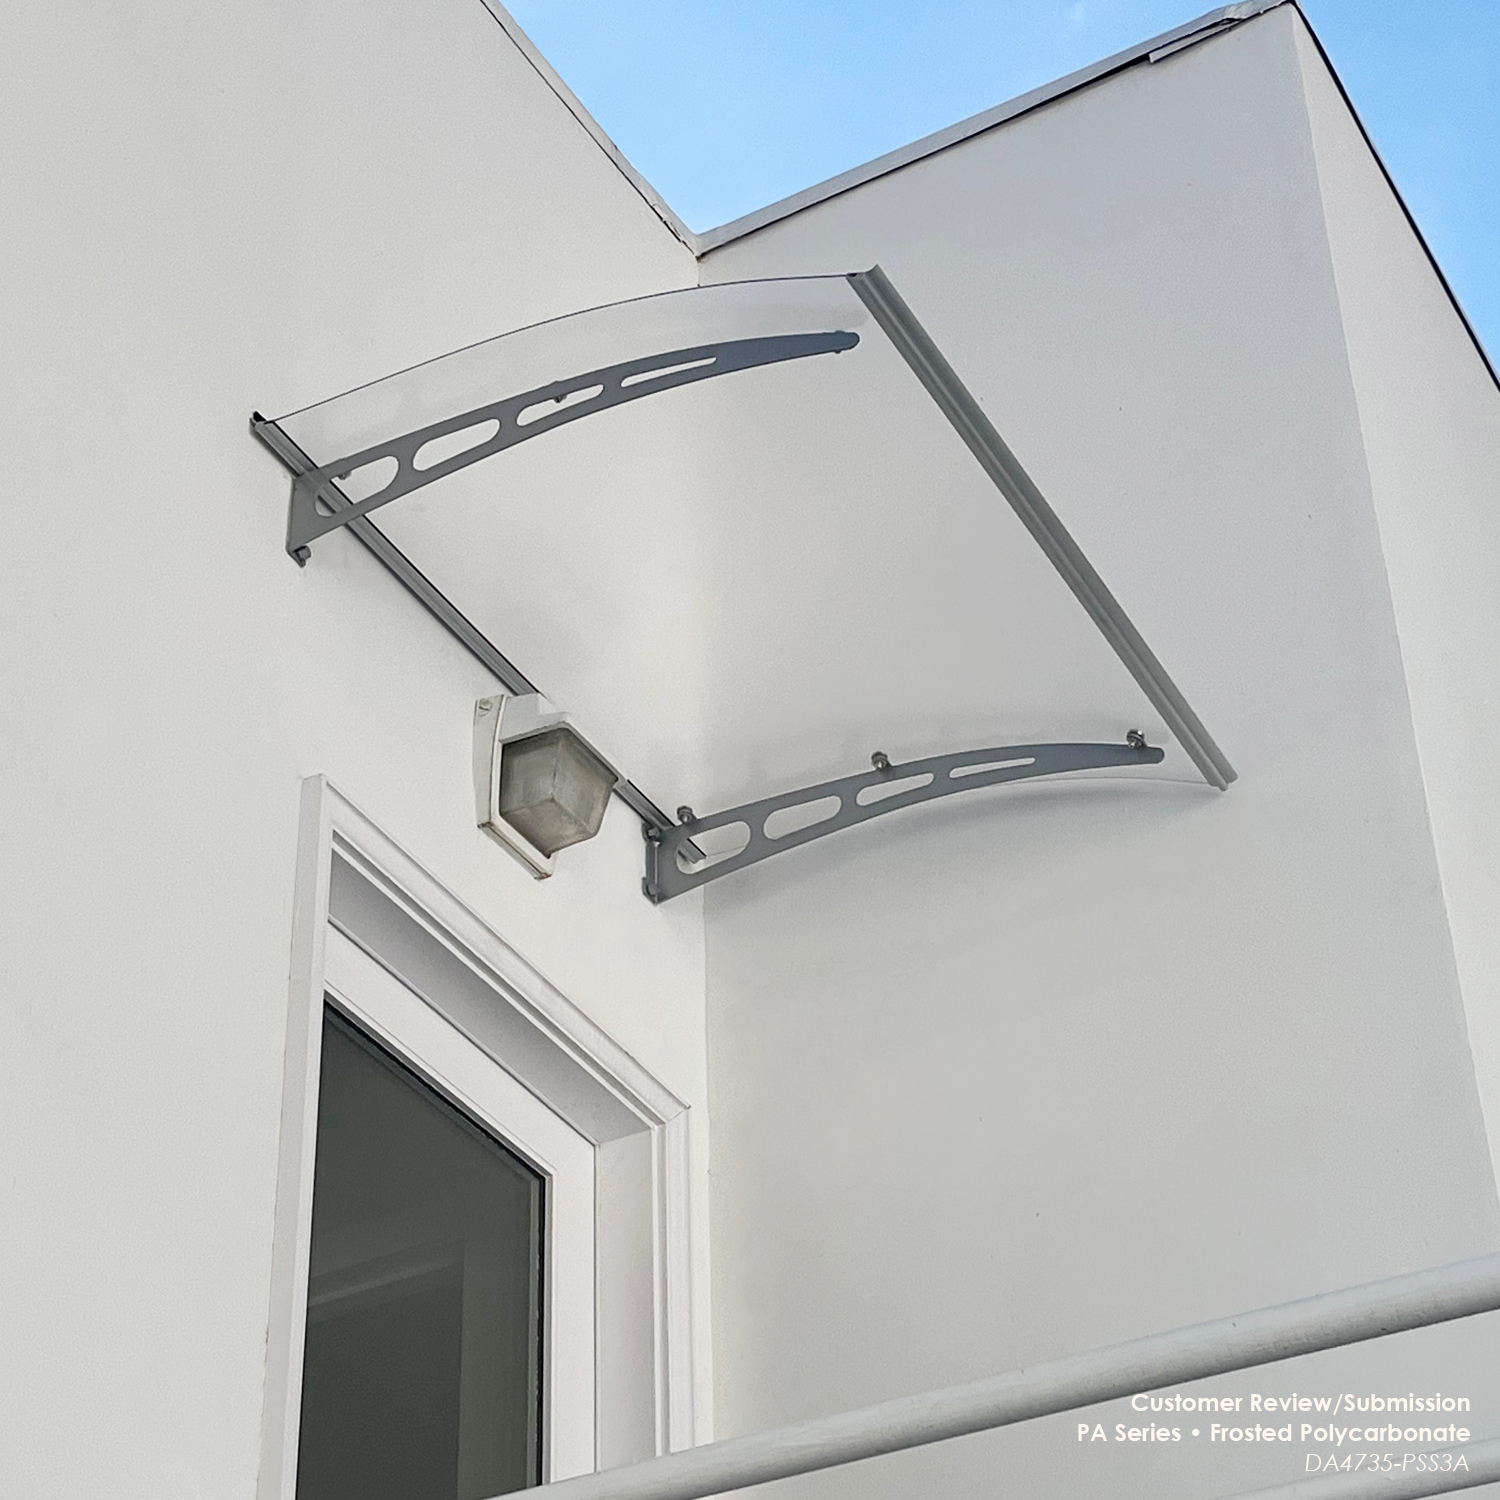
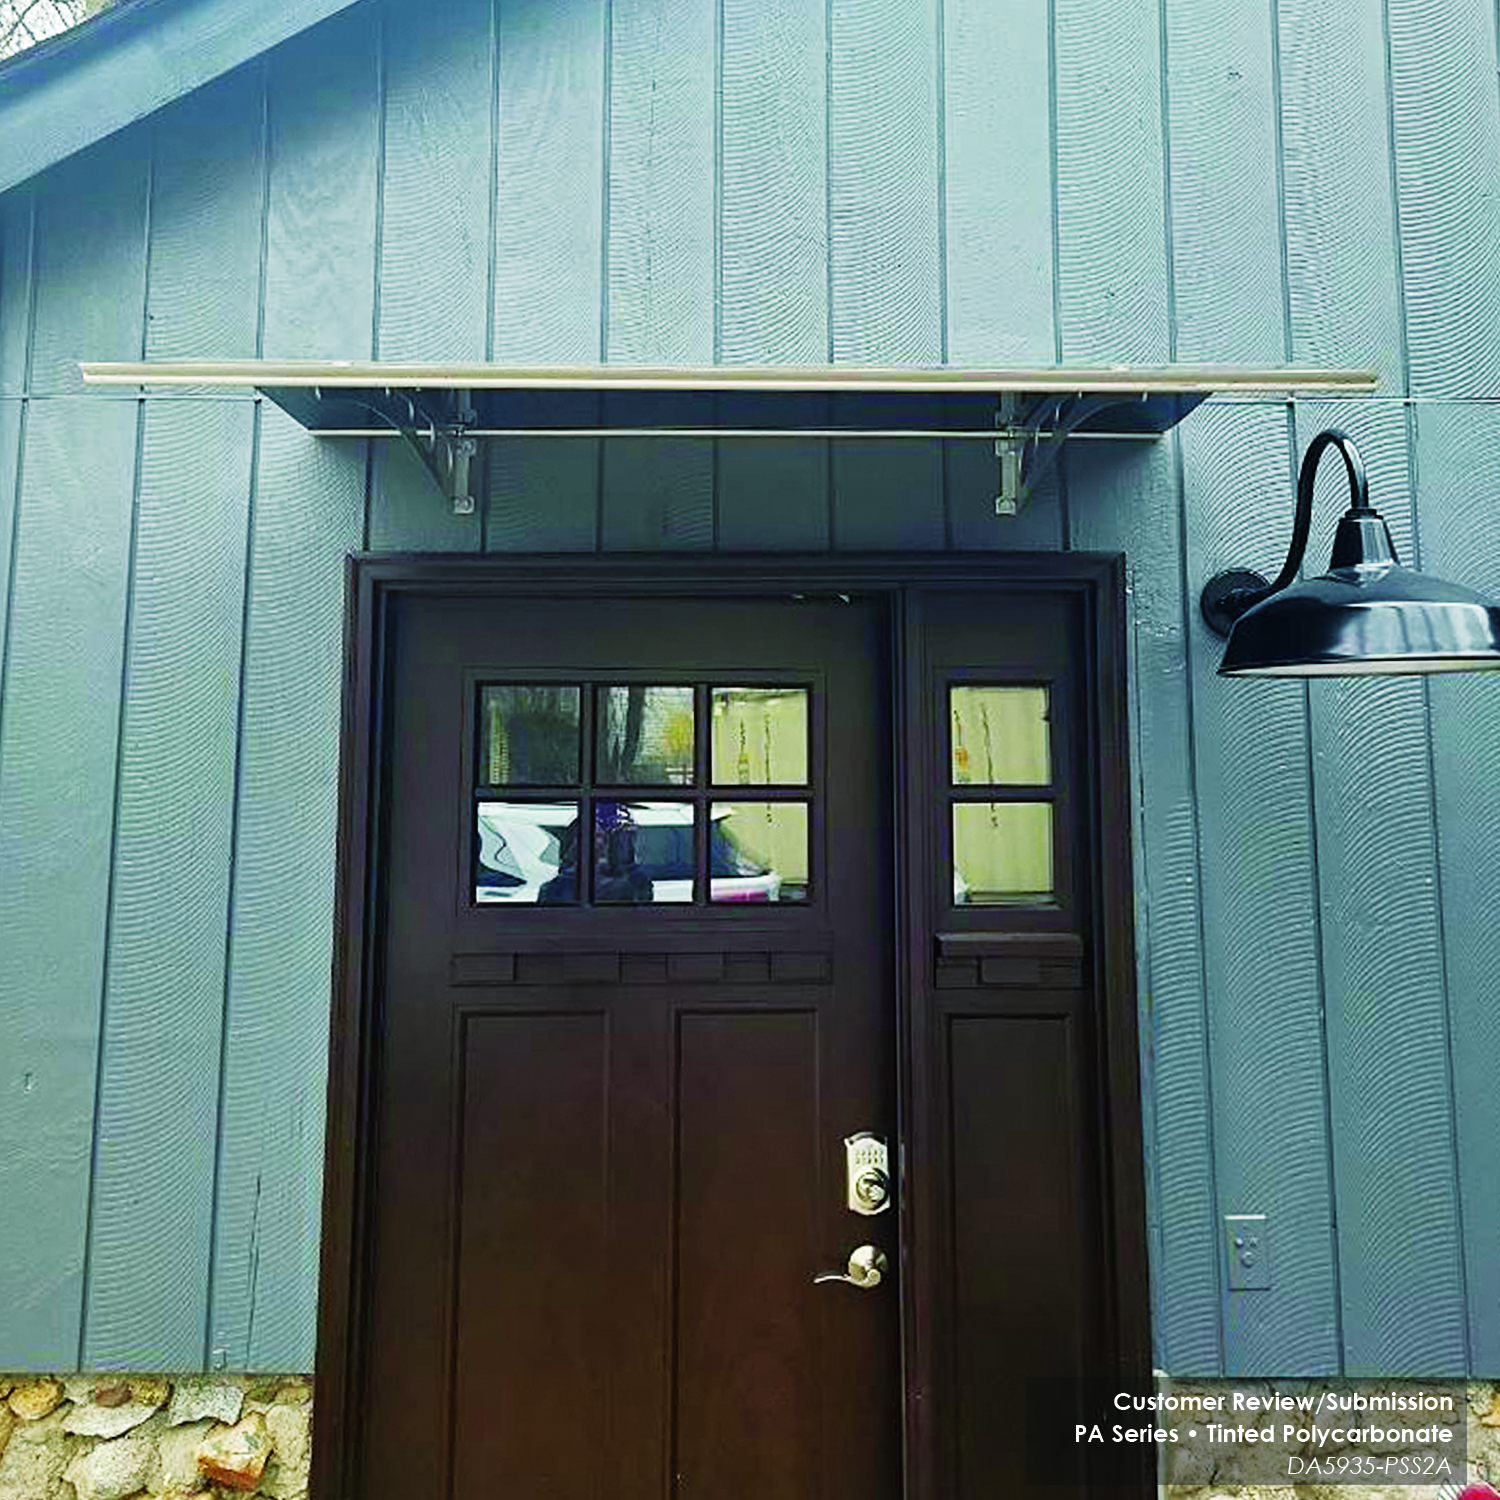
PA Series is available in three different polycarbonate sheets; Clear, Tinted Gray, and Frost. These options are available in sizes 47″x35″ and 59″x35″
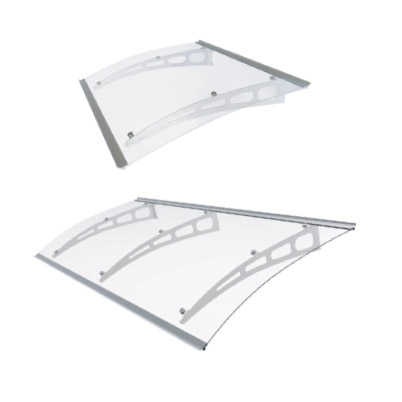
Size Options
PA Series is available in four different size options; 47″x35″, 59″x35″, 79″x35″ and 94″x35″. These size ranges will include two or three brackets, please refer to the Owner’s Manual page 3 for details.
Industrial Standard Parts
Industry grade parts are included ensuring your investment lasts. Included are EPDM rubber strips to keep excess liquid and moisture penetration, 304-grade stainless steel screws for wood installs.
Tested Quality
Advanings polycarbonate awnings (PA and PN Series) have been independently tested by Intertek Labs and ATS Labs.
Specifications
| Series | PA Series Awning |
|---|---|
| Model Numbers |
|
| Feature | Heavy-Duty, Modern Sleek Arched Profile. Solid Polycarbonate with Solid Die Cut Aluminum Brackets – Light Weight. |
| Width (inch) |
|
| Depth (inch) | 35.8 |
| Height (inch) | 7.9 |
| Polycarbonate Panel | Virtually Unbreakable made of 100% Virgin Raw Material for Ultra Clarity and Quality Control. Independently Tested by Intertek and ATS for load capacity: PA/PN Test Report |
| Polycarbonate Panel Color Codes | Clear: 1A, Frosted: 2A, Tinted Gray: 3A |
| Polycarbonate Panel Thickness (mm) | 3 |
| Bracket | Solid Die Cut Aluminum Construction 1061-T3 Grade |
| Bracket Color | Powder Coated Silver Finish |
| Front/Rear Fixing Bar | Solid Aluminum 6061-T3 Grade, Powder Coated Silver Finish |
| Polycarbonate Securing Hardware | Stainless Steel with Plastic Gasket Washers |
| Lag Screws | Stainless Steel 304 Grade; size: 3″ L x 9/32″ W, requires 7/32″ Drill Bit |
| Rubber Gasket Strips | EPDM Grade |
| Rubber Strips | EPDM Grade |
| Masonry Bolts (Sold Separately) | Optional, Part# ZDA-WEB-R2, Stainless Steel 304 Grade Expanding Bolts. Qty 2 per Bracket Needed, size: 3″ L x 3/8″ W, requires 3/8″ Drill Bit |
| Prop65 | California Residents |
Support
Pre-Installation Guide
- What is polycarbonate awning?
- A polycarbonate awning is a stationary awning product with brackets that is permanently attached to your home, business or other structure. It provides protection from rain, snow, and hail. These products can also provide protection from the sun and UV rays.
Typically, a polycarbonate awning is smalller in projected size and may be available in a variety of widths and, depending on the style, can be connected to allow for customers to customize width coverage, if needed.
Follow Up Questions
1. What is polycarbonate? Answer: Polycarbonates (PC) are a group of thermoplastic polymers containing carbonate groups in their chemical structures. Polycarbonates when used in engineering materials are proven to be stronger and more break resistant than most other plastics. Polycarbonates can range in thickness, density (hollow or solid), clarity and textures depending on the individual manufacturing process.
2. What makes polycarbonate better than glass? Polycarbonate is lighter in weight. Solid sheets are virtually unbreakable and have more flexibility and strength than glass. - What differentiates Advanings polycarbonate awnings from its competitors?
- Both of Advanings polycarbonate awning series; PN & PA feature a 1/8″ solid sheet of virgin material polycarbonate. This sheet when combined along with the quality components included with either the PN or PA series makes for a superior product that outlast similar competitors on the market today.
•Polycarbonate Strength: When compared to others polycarbonate awnings, one major difference is the polycarbonate strength and quality. As most competitors offer low-cost hollow polycarbonate typically made of lesser grade materials containing impurities that are weak to impact stresses and heavy loads. Advaning’s solid sheets are virtually unbreakable and have been tested to withstand from 200lbs up to 550lbs (depending on size and series). Click Here to Review Weight Limit Test
•Polycarbonate Structure: Hollow sheets are prone to dust, moisture, and mold collection within the cavities. Due to the structure design of the cavaties they are difficult to clean and will need special equipment or replacement when dirty. Advaning polycarbonate sheets are solid, crystal clear and require minimal maintanance.
•Polycarbonate Seams: In order to save money on shipping, competitors offer connectable polycarbonate sheets that require a plastic connection piece that connects two or more smaller sheets together. On top of being unsightly this plastic connection piece is typically made of cheap non-uv rated plastic which tends to breack or crack easily when exposed to the elements. Advaning’s polycarbonate awnings are seamless solid sheets of polycarbonate with zero obstructions.
•Brackets; Competitors offer plastic brackets that like the connection pieces they offer are typically never UV rated and will not last long when exposed to the suns rays. Advaning offers two styles of brackets that are made of materials proven to last in the elements; PA series includes die cut solid aluminum brackets powder coated finished in metallic silver. PN series includes an injection mold nylon with fiberglass reinforced bracket in either Black or White – The unique design allows users to connect multiple units side by side to achieve custom widths.
•Assembly Components: Most competitors offer lower grade rubber seals and installation hardware. Advaning offers EPDM rated rubber seals, top quality alluminum front / rear bar caps, and SS304 rated installation hardware
•Warranty and Service: Most competitors do not offer a warranty beyond the return or grace 30-day period. Advaning is proud to include a 2-year warranty along with a lifetime customer support from our Orange County California based service center. - Where can I purchase Advaning products?
- Advaning awning products can be purchased online via most major online retailers along with www.advaning.com and www.advaningshop.com. or from our growing list of regional distributors/installers. For a list of regional distributors/installers please send an email to service@advaning.com along with your zip code or complete address.
Follow Up Questions:
1. How long does a polycarbonate awning take to arrive at my location once an order is placed? Answer: Advaning does not control the shipper, shipping speed, or service level of our distributors, installers, or our marketplace dealers. We encourage you (the customer) to contact your point of sale for specifics about delivery or order details. When an order is placed via our shop site: www.advaningshop.com or www.advanig.com, you can expect to receive tracking information typically within 48hrs and delivery completion within 7-14 business days after the order is received.
2. What kind of carrier does Advaning use to ship the polycarbonate awnings? Answer: Advaning does not control the shipper, shipping speed or service level of our distributors, installers, or our marketplace dealers. We encourage you (the customer) to contact your point of sale for specifics about delivery or order details. When an order is placed via our shop site: www.advaningshop.com or www.advaning.com you can expect your polycarbonate awning order to ship via a select Freight Carrier, FedEx or UPS – depending on the size and qty of units ordered. Freight carriers require a delivery signature confirmation and direct communication with the buyers to coordinate and schedule the delivery of our product. - Click Here for More FAQ’s
RAQUEL –
SO NICE NOT TO GET WET TRYING TO GET INTO OUR HOME NOW.
RAQUEL –
SO NICE NOT TO GET WET TRYING TO GET INTO OUR HOME NOW.
John B. Hartleb –
If you are thinking about awnings for your home, then look no further. I looked at the cheap ones at Home Depot and here on amazon and they are made of plastic (Brackets) and the awning itself is just corrugated board that is used for like garage sale signs. No thanks. If I am going to put something on my home, I am not going cheap. I also don’t like to waste money. So I gave these a try. These awnings are spectacular. Solid metal brackits with real plexi top. Everything about this unit is top notch. For a similar unit locally I was in the price range of $400 to $800. These are a deal. Let me give you some advice. As with all of this stuff…the instructions and tool list is horrible. I will give you the truth. Look at my photos. Those are the tools you really need. Also, these are supposed to have gaskets that you put on the edge of the plexi…and then you are to tap the side channels on. Good luck. Don’t even try. Just buy the silicone that I show and use this instead of the gaskets. Make sure you have some rags and goof off ready if you get any on anything else. Here are my instructions.
Before you do ANYTHING….Silicone the trim pieces onto the plexiglass and let sit overnight. I filled the channel of the trim piece with silicone and then stuck it on. Pay attention to the label that says “Wall..this side up”. The reason why I say to let these dry over night is to prevent any silicone getting onto your gorgeous clear plexi and for it to make a great seal. Don’t skip this step. Be patient. Then mount the next day.
Next day.
#1 Take everything out of the box and lay it all out.
#2 Use a 48″ sheet rock ruler to measure the holes center to center on the Plexi. The holes are exact to where you need to mount the brackets. Measure and mark 3 times before drilling the holes. You only get one chance. You screw up, you are in trouble. ALSO…Make sure you consider how much the PLEXI hangs over the bracket for clearance. I almost screwed up.
#3 Drill the top holes only. Put caulking or sealent into the hole. Screw in the top bolt about half way. Then hold the bracket as precise as possible and mark the bottom hole. Drill the bottom hole and put the bolt in. NOTE I have siding on my home as you can see, so the bottom hole required 3 washers next to the house to keep things right on.
#4 Get both brackets mounted. PUT THE SCREW COVERS ON NOW.
#5 Now get the plexi and place it correctly on top of the brackets. Put the bolts in one at a time just finger tight. Once all bolts are in finger tight, use a hand nut driver to tighten snug.
#6 This was my idea. There is a small gap between the house and the awning. I used Alien Tape to seal that gap. I used the first strip onto the awning as you can see. Then I used a second strip attached to the house going over the first strip of tape on the awning creating a rubber flashing.
All done. I hope your install goes as good as mine. I hope these hints help. I threw away all of the gaskets provided. I have no clue how the manufacturer expects you to get those on. Silicone is your friend and changes a nightmare into an easy task.
TARA –
Great for me. No Problems.